
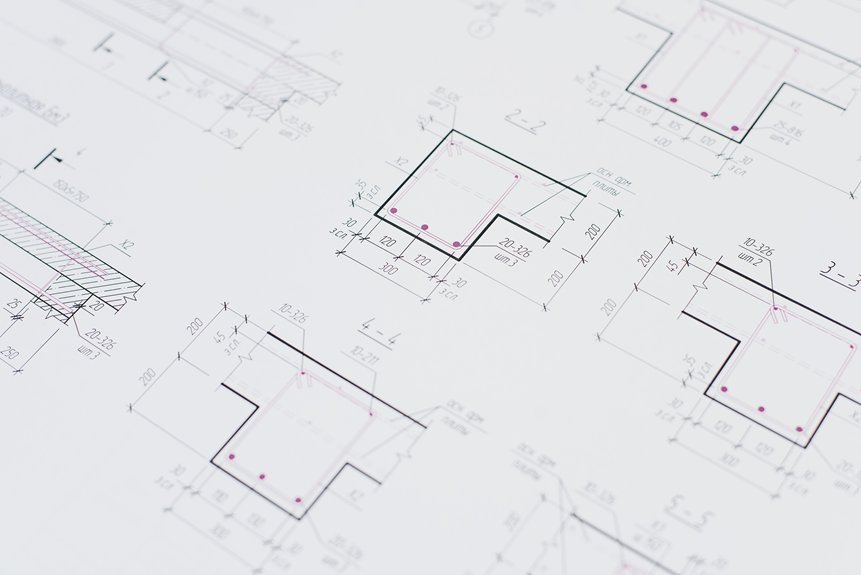
Interpreting complex schematic drawings for thermal insulation estimating is crucial for achieving precision in your projects. It is essential to understand the symbols, lines, and components to ensure your estimates remain accurate.
By breaking down the schematics into simpler parts, you can navigate through the intricate details more effectively. However, when you encounter discrepancies or unfamiliar symbols, it is important to know how to address these challenges. Familiarising yourself with common obstacles can significantly enhance your estimating practices and lead to more efficient outcomes.
Incorporating these strategies will help you refine your skills and ensure you are well-prepared for any complexities that arise in thermal insulation estimation.
Key Takeaways
- Familiarise yourself with common symbols in insulation schematics, as this enhances your understanding and interpretation of the drawings.
- Break down complex schematics into manageable sections, focusing on key components and their relationships to aid comprehension.
- Utilise software tools for improved visualisation and accuracy when analysing insulation schematics, making it easier to identify critical details.
- Cross-reference schematics with project specifications to ensure clarity and alignment with insulation requirements.
- Practise regularly and collaborate with experienced professionals to enhance your skills in reading and interpreting complex schematic drawings.
Why Understanding Schematics Is Key to Accurate Insulation Estimates
Understanding schematic drawings is crucial for anyone involved in thermal insulation projects. Whether you’re a seasoned pro or just starting out, mastering schematic interpretation helps you grasp the essential details of insulation installations. By visualizing how insulation materials fit into a building’s layout, you’ll improve your insulation efficiency.
When you analyze these drawings, you can spot key elements that impact the overall thermal performance. You’ll learn to identify spaces that require more insulation, ensuring that you execute projects accurately and efficiently. This not only prevents costly mistakes but also builds your confidence within your team.
Being part of a community that values precise communication and collaboration makes you feel connected as you work on these projects.
Common Symbols in Insulation Schematics
How can you quickly make sense of the common symbols found in insulation schematics? Understanding these insulation symbols is essential for effective schematic interpretation.
Here’s a quick overview of some common symbols you’ll encounter:
- Thermal Insulation: Typically shown as a shaded area or specific texture pattern.
- Piping: Lines representing pipes often include their insulation types and thicknesses.
- Valves and Fittings: Indicated with unique symbols to help identify their function.
Identifying Key Components
While you navigate through insulation schematics, identifying key components is crucial for grasping their layout and function. Each visual representation serves as a roadmap, showing the placement of materials and their roles in the overall system. Start by locating major elements like insulation types, structural supports, and HVAC systems. These components are essential for understanding how different parts interact—recognizing their relationships helps you see the bigger picture.
Look for connections between components, as these relationships often indicate how heat and air flow through the system. By understanding these links, you’ll gain insight into performance efficiency and design effectiveness. Pay attention to any annotations that may describe specific materials or installation methods, as they can provide additional context.
Ultimately, becoming familiar with these key components will improve your confidence in reading and interpreting insulation schematics, fostering a sense of belonging in this technical field.
Decode Lines and Annotations for Better Understanding
Recognizing the key components of insulation schematics sets the stage for deciphering lines and annotations, which can reveal a wealth of information.
Understanding line clarity and annotation significance is vital for grasping the details of thermal insulation layouts.
- Line clarity helps distinguish different insulation types, thickness levels, and installation methods.
- Annotations provide context, explaining material specifications and installation requirements.
- Common symbols convey critical information quickly, making the schematics easier to navigate.
Estimating Thermal Insulation Needs
When you’re estimating thermal insulation needs, it’s crucial to identify the key components in your schematic.
Knowing how to calculate the appropriate insulation thickness will help you achieve optimal energy efficiency.
Let’s break down these steps so you can make informed decisions for your project.
Identifying Key Components
Understanding the key components of thermal insulation is crucial for estimating your insulation needs effectively. Recognizing component functions and the different insulation materials available helps you make informed decisions.
- Types of Insulation Materials: Familiarize yourself with options like fiberglass, foam, and cellulose. Each has unique properties that affect performance.
- R-Value Importance: Learn how the R-value measures the insulation’s effectiveness. Higher R-values indicate better thermal resistance, crucial for reducing energy costs.
- Application Areas: Identify where insulation is placed, like walls, attics, or pipes. Each location may require different materials for optimal performance.
Calculating Insulation Thickness
Now that you have a solid grasp of the key components of thermal insulation, it’s time to focus on calculating the right insulation thickness for your project.
Start by understanding the insulation materials you’ll use, as different materials have unique thermal resistance values. To determine the thickness calculation, consider the desired R-value and the area you need to insulate.
By combining these factors, you can find the necessary thickness to achieve optimal energy efficiency. Measure your space carefully and consult manufacturer guidelines for your chosen insulation materials.
Remember, an accurate thickness calculation not only improves comfort but also promotes sustainability, ensuring you’re part of a community committed to energy conservation.
Keep it precise, and you’ll feel confident in your estimating skills!
Common Reading Challenges and Solutions
When reading schematic drawings for thermal insulation, you might run into some common challenges.
Identifying key symbols and understanding scale accuracy can trip you up if you’re not familiar with them.
Let’s break down these issues and find effective solutions to improve your reading skills.
Identifying Key Symbols
Reading schematic drawings for thermal insulation can be a bit challenging at first, especially with the array of symbols and notations used. However, once you understand key symbols and their functions, it becomes much easier.
Here are some tips to improve your interpretation techniques:
- Familiarize yourself with common symbols like insulation types, thicknesses, and application methods.
- Keep a reference guide handy to decode symbols quickly.
- Practice with real-life examples, as repetition solidifies your understanding.
Once you’re comfortable with these symbols, you’ll feel a sense of belonging in discussions on thermal insulation.
Connecting with others who share similar challenges can make the learning process more enjoyable and collaborative!
Understanding Scale Accuracy
Scale accuracy can be one of the trickiest aspects of interpreting schematic drawings for thermal insulation. When you encounter these drawings, understanding scale measurement is crucial. If you don’t grasp the dimensions accurately, your insulation estimates could be off, leading to wasted materials and costs.
That’s where accuracy importance comes into play. You can improve your skills by familiarizing yourself with common scales used, like 1:50 or 1:100. Keep a ruler handy for quick conversions and always double-check your calculations.
It’s also helpful to discuss challenges with peers; you’re not alone in this learning process. By mastering scale accuracy, you’ll feel more confident and connected within your team, making a real impact in your insulation projects.
How to Keep Track of Your Insulation Estimates Like a Pro
Keeping tabs on your insulation estimates can make a significant difference in your project’s success. To stay organized and efficient, leverage tracking software and estimation templates that suit your workflow. Utilizing these tools allows for error management and ensures adherence to industry standards.
Here are some best practices to keep your estimates professional:
- Utilize Collaboration Tools: Engage with your team for real-time updates and inputs.
- Network Professionally: Connect with peers to share case studies and learn from their experiences.
- Commit to Continuous Education: Stay updated on industry standards and best practices to refine your skills.
Conclusion
In conclusion, mastering the ability to read complex schematic drawings is essential for accurate thermal insulation estimates. By familiarising yourself with symbols, recognising components, and interpreting lines, you can enhance your estimating process.
Utilising software tools for improved visualisation can be beneficial, and collaborating with experienced colleagues may further refine your skills. With dedicated practice and a systematic approach, you can confidently navigate any schematic, ensuring that your insulation estimates remain both precise and efficient.